A small puddle under the front of your vehicle can turn into an overheated engine at the worst possible time. Knowing how to check coolant leaks gives you a chance to catch a hose, clamp, radiator, or water pump problem before the cooling system loses enough fluid to put your engine at risk.
Coolant leaks do not always leave an obvious puddle. Some only appear while the engine is hot and the system is pressurized. Others evaporate on hot components, leak internally, or collect behind covers where they are difficult to see. A careful inspection can tell you whether you are dealing with a simple external leak or a problem that needs professional diagnosis.
Start With Safety and the Right Conditions
Never remove a radiator cap or coolant reservoir cap when the engine is hot. The cooling system is pressurized, and hot coolant can spray out forcefully enough to cause serious burns. Let the vehicle sit until the engine is completely cool, preferably for several hours or overnight.
Park on level ground and, if possible, inspect the vehicle in good light. A clean driveway, cardboard placed under the vehicle, and a flashlight make small leaks easier to trace. If the underside is heavily coated in dirt or old fluid, it may be worth having it cleaned before a diagnosis. Fresh coolant stands out far better against a clean engine bay and undercarriage.
Coolant can be green, orange, pink, blue, yellow, or purple depending on the vehicle and the type installed. Do not identify it by color alone. It usually feels slightly slippery, has a sweet odor, and may leave a white, green, pink, or orange crust as it dries. Keep pets away from spills. Antifreeze is highly toxic, even in small amounts.
How to Check Coolant Leaks Under the Hood
With the engine cold, begin by checking the coolant level in the overflow reservoir. Most reservoirs have a cold fill line. If the level is below that mark, there may be a leak, but do not assume the reservoir itself is the source. Coolant can drop after an engine overheats, after recent service, or because air has worked out of the system.
Look around the reservoir for cracks, wet spots, staining, or dried residue near the cap and hose connection. Then inspect the radiator cap, if your vehicle has an accessible one. A weak cap can allow coolant to escape or prevent the system from holding the pressure it needs to circulate coolant correctly.
Follow the upper and lower radiator hoses by hand and visually inspect their full length. You are looking for dampness around the ends, swollen rubber, splits, rubbing damage, or crusty residue around hose clamps. Hoses can leak only when hot, so a dry hose is not always proof that it is good. Still, visible residue is a strong clue that coolant has been escaping.
Next, inspect the radiator as much as access allows. Pay close attention to the plastic end tanks, seams, hose connections, and lower corners. Road debris and corrosion can damage the radiator, while age and heat cycles can crack plastic tanks. Coolant residue on the front of the radiator or behind the grille may point to a leak that is hard to see from above.
Check around the thermostat housing and coolant outlet as well. These parts are often plastic or aluminum and can warp, crack, or lose their seal over time. On many engines, the housing sits near the upper radiator hose connection, but the exact location depends on the vehicle.
Look Below the Vehicle, but Do Not Guess
A puddle provides useful information, but its location is only a starting point. Fluid can travel along engine covers, subframes, and splash shields before it drips to the ground. A puddle near the passenger side does not always mean the leak started on that side.
Place clean cardboard under the vehicle after parking it overnight. In the morning, note the color, amount, and general location of any drip. Coolant often leaves a colored stain or dried crystal-like deposit. Clear water near the passenger side after using the air conditioning is usually normal condensation, not coolant.
While looking underneath, inspect the lower radiator hose, the bottom of the radiator, and the surrounding splash shield. Do not crawl beneath a vehicle that is supported only by a jack. Use proper jack stands or leave under-vehicle inspection to a repair shop.
There are several common places coolant leaks show up:
- Radiator seams, end tanks, and drain plugs
- Upper and lower radiator hoses, heater hoses, and clamps
- Water pump weep holes and gasket surfaces
- Thermostat housings, coolant pipes, and engine coolant outlets
- Heater cores, freeze plugs, and intake manifold gaskets on certain engines
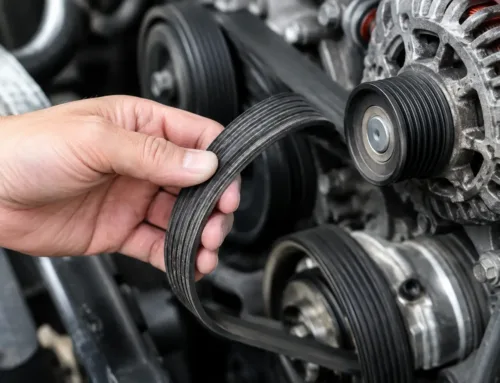
A leaking water pump may leave coolant residue around the pulley area or drip from a small weep hole. Because belts and pulleys can spread fluid around the engine bay, this leak can be misleading. Do not inspect near moving belts with the engine running.
Watch for Signs of a Leak Inside the Cabin or Engine
Not every coolant leak reaches the ground. A leaking heater core can cause a sweet smell inside the cabin, fogging on the windshield, damp carpet on the passenger side, or reduced heater performance. Ignoring this type of leak can lead to interior damage and low coolant levels that eventually cause overheating.
Internal coolant loss is more serious and requires a proper diagnosis. Persistent white exhaust after the engine is fully warm, unexplained coolant loss without external drips, overheating, rough starts, or milky contamination in the engine oil can be warning signs. None of these symptoms proves a blown head gasket by itself, but they should not be treated as a wait-and-see issue.
Check the engine oil dipstick when the engine is off and on level ground. Normal oil can range from amber to dark brown or black depending on its age. A tan, creamy appearance may suggest coolant contamination, although short trips and moisture buildup can sometimes create a small amount of residue under the oil cap. A technician can confirm the cause with cooling-system and combustion-gas testing.
Check the Temperature Gauge and Coolant Level Over Time
Your dashboard can reveal a coolant problem before you see a leak. If the temperature gauge climbs higher than normal, fluctuates, or an overheating warning appears, pull over safely and shut the engine off as soon as conditions allow. Continuing to drive an overheating vehicle can warp cylinder heads, damage head gaskets, and create repair costs far beyond the original leak.
For a slow leak, check the cold coolant level over several days. Take a photo of the reservoir level or mark it with a piece of tape on the outside of the tank. If the level keeps dropping, coolant is leaving the system even if there is no puddle. Do not keep topping it off indefinitely. Repeated top-offs can hide a worsening leak and can introduce the wrong coolant type if products are mixed carelessly.
Use only the coolant specification recommended for your vehicle. Universal products may be appropriate in some situations, but coolant chemistry matters. Mixing incompatible types can reduce corrosion protection and create deposits in the cooling system. If you are unsure what was installed previously, a coolant service and correct refill may be the safer choice.
When a Pressure Test Is the Best Next Step
The most reliable way to locate many leaks is a cooling-system pressure test. A technician attaches a hand pump and adapter in place of the radiator or reservoir cap, then pressurizes the system to the vehicle’s specified range with the engine off and cold. This can reveal leaks at hoses, radiators, water pumps, housings, and connections without the hazards of inspecting a hot running engine.
Some leaks still need additional testing. A dye test can help trace a tiny external leak, while a combustion-gas test can help identify combustion pressure entering the cooling system. These tests are especially useful when coolant is disappearing but no external source is visible.
At Beyond Auto Performance, a proper cooling-system inspection focuses on the cause, not just topping up the reservoir. That means checking the visible components, pressure testing when needed, and explaining what was found before recommending repairs.
Do Not Drive on an Active Overheating Problem
A minor seep at a hose connection may allow time to schedule service, as long as the coolant level is stable and the engine temperature remains normal. A steady drip, a rapidly dropping coolant level, visible steam, or any overheating warning is different. Stop driving and arrange for the vehicle to be inspected or towed if necessary.
Catching a coolant leak early is usually straightforward. The real value is protecting the engine behind it. A few minutes spent checking the reservoir, hoses, radiator area, and driveway can help you make a calm repair decision before a small cooling-system issue becomes a roadside breakdown.